Firstly, what is Hoya Serpens?
Hoya Serpens, also known as the “Wax Flower” or “Porcelain Flower,” is a charming and sought-after plant within the Hoya genus, prized for its delightful foliage and enchanting blooms. Here are some key characteristics:
Appearance
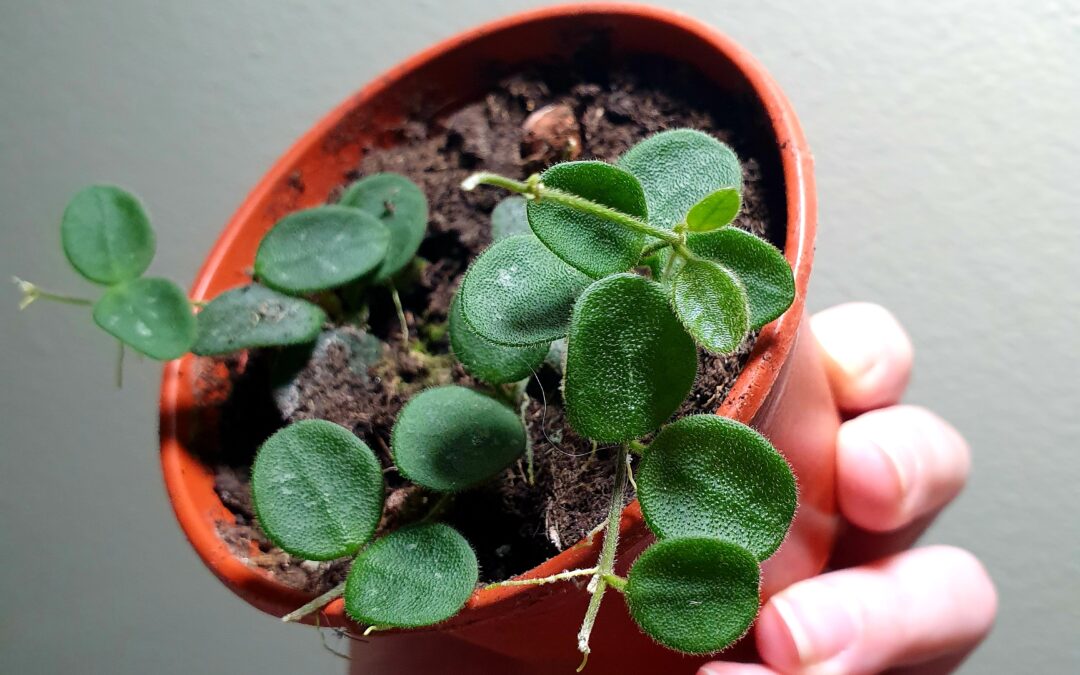
- Foliage: Hoya Serpens features small, round, and succulent-like leaves that are light green in color and slightly fuzzy. The leaves are typically around 1-2 centimeters in diameter, creating a lush and compact appearance.
- Flowers: The plant is renowned for its delicate and fragrant flowers. The blooms are star-shaped and usually appear in clusters. Each flower has a waxy texture and can be white to pale green with a darker center, giving it a porcelain-like appearance. The flowers emit a pleasant, sweet fragrance, particularly in the evening.
Growth Habits
- Vining Nature: Hoya Serpens is a climbing or trailing plant, often grown in hanging baskets or allowed to climb on trellises. It can spread over time, creating an attractive cascading effect.
- Slow Growth: This Hoya species grows relatively slowly, making it manageable for indoor cultivation.
- Light Requirements: It thrives in bright, indirect light but can tolerate some shade. Direct sunlight should be avoided as it can scorch the leaves.
Care
- Watering: Hoya Serpens prefers to dry out slightly between waterings. Overwatering can lead to root rot, so it is essential to allow the soil to dry out somewhat before watering again.
- Soil: A well-draining, airy soil mix is ideal. A combination of orchid bark, perlite, and a small amount of peat or coco coir works well.
- Humidity and Temperature: It enjoys higher humidity levels and thrives in temperatures ranging from 60°F to 80°F (15°C to 27°C). It is sensitive to cold temperatures and should be protected from drafts.
How to root Hoya Serpens?
Propagating Hoya Serpens through water rooting can be an effective and rewarding method. Here’s a step-by-step guide on how to do it:
Materials Needed
- Healthy Hoya Serpens plant
- Clean, sharp scissors or pruning shears
- Clear glass or jar
- Fresh water
- Rooting hormone (optional)
- A bright, indirect light location
Step-by-Step Guide
1. Selecting and Cutting the Stem
- Choose a Healthy Stem: Select a healthy, vigorous stem with several leaves and at least a couple of nodes (the points where leaves are attached).
- Make the Cut: Using clean, sharp scissors or pruning shears, cut a 4-6 inch stem just below a node. Ensure the cut is clean and angled to maximize the surface area for rooting.
2. Preparing the Cutting
- Remove Lower Leaves: Strip off the leaves from the bottom node(s), leaving a few leaves at the top. This helps to direct the plant’s energy towards root development.
- Optional: Rooting Hormone: Dip the cut end of the stem in rooting hormone powder. While this is optional, it can help stimulate root growth.
3. Placing the Cutting in Water
- Fill the Jar: Fill a clear glass or jar with fresh water. Make sure the water level is high enough to cover at least one node but not so high that it submerges the leaves.
- Position the Cutting: Place the cutting in the water, ensuring that at least one node is submerged.
4. Providing the Right Environment
- Light: Place the jar in a bright location with indirect light. Avoid direct sunlight, as it can overheat the water and stress the cutting.
- Humidity: If the air in your home is very dry, consider placing a plastic bag over the jar to create a mini greenhouse effect, which can help maintain humidity around the cutting.
5. Monitoring and Maintenance
- Change the Water: Change the water every few days to keep it fresh and oxygenated. This helps prevent bacterial growth and promotes healthy root development.
- Check for Roots: Roots should start to form within 2-4 weeks. Look for white roots emerging from the nodes submerged in water.
6. Transplanting the Cutting
- Prepare a Pot: Once the roots are about 1-2 inches long, prepare a small pot with well-draining soil. A mix of orchid bark, perlite, and a small amount of peat or coco coir works well.
- Plant the Cutting: Carefully remove the cutting from the water and plant it in the prepared pot, burying the roots and ensuring the stem is supported.
- Watering: Water the soil lightly, ensuring it is moist but not waterlogged.
7. Post-Transplant Care
- Light: Continue to provide bright, indirect light.
- Humidity and Temperature: Maintain high humidity and a temperature range of 60°F to 80°F (15°C to 27°C).
- Watering: Allow the top layer of soil to dry out between waterings to prevent root rot.
Tips for Success
- Patience: Hoya Serpens is a slow grower, so be patient during the rooting and establishment process.
- Healthy Mother Plant: Ensure the mother plant is healthy and pest-free to increase the success rate of propagation.
- Regular Monitoring: Keep an eye on the cutting for any signs of rot or disease, and take corrective actions if needed.
Following these steps will help you successfully propagate Hoya Serpens through water rooting, allowing you to enjoy more of these delightful plants.
Good Luck!